ProofLex
Open Appi-Resonate Help Center
ProofLex Help
Document Creation
Proofreading
Doc Insights
Team Management / WorkFlows
ContentCraft Help
MindWrite Help
How to create workflows with ProofLex?
Workflows in ProofLex are a set of coordinated actions performed collaboratively by your team members and AI Agents.
The system comes with a few predefined group of actions (WorkFlow Templates) that could be used in a Workflow. However user can also create custom actions and templates to fit their specific process.
Each workflow ultimately produces a single document as its outcome. They’re designed to streamline processes that involve multiple sequential steps such as:
-Document creation/Import
-Grammar checking,
-Citation insertion,
-Privacy Checks,
-compliance verification
... each handled by different people or bots.
ProofLex workflows automate the tracking, assignments(tasks) and notifying so the final review is hassle free.
IMPORTANT: You can access a workflow only if you have a ProofLex Enterprise Plan. Only Super Admins and Team Admins can create workflows for the teams.
They can define the sequence of tasks (Workflow Templates), and assign specific tasks to either a team member or an AI Agent.
Follow these steps to create workflows in ProofLex :
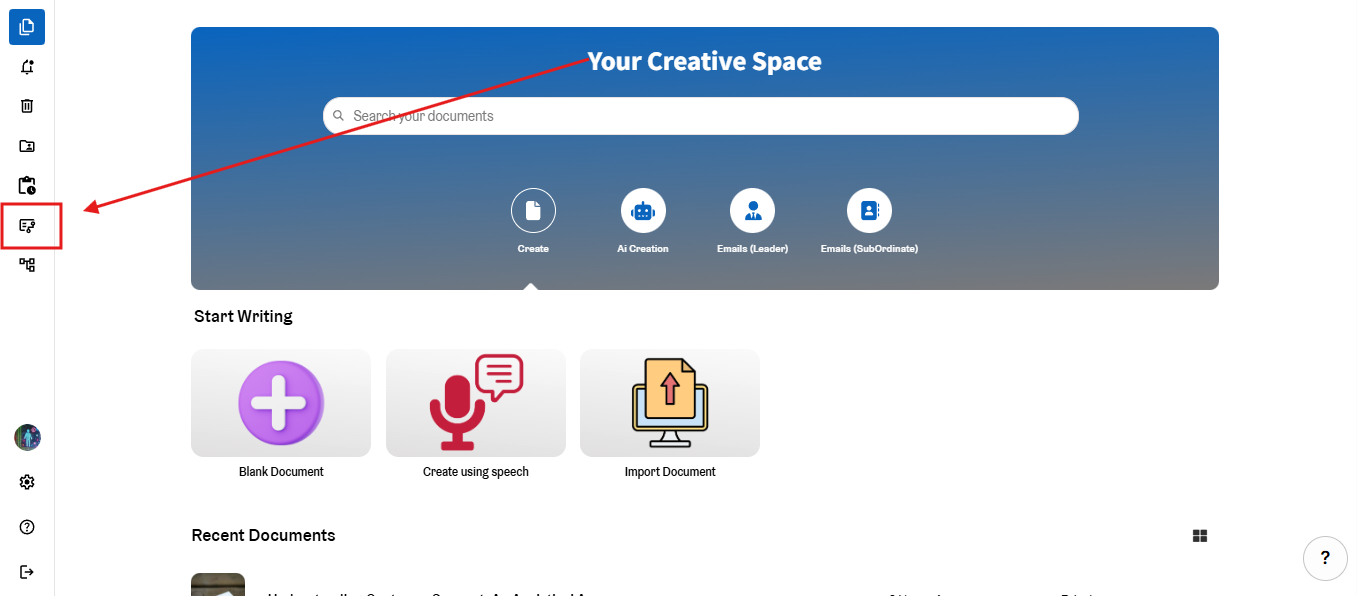
STEP 1: Click the Workflow icon from the left navigation.
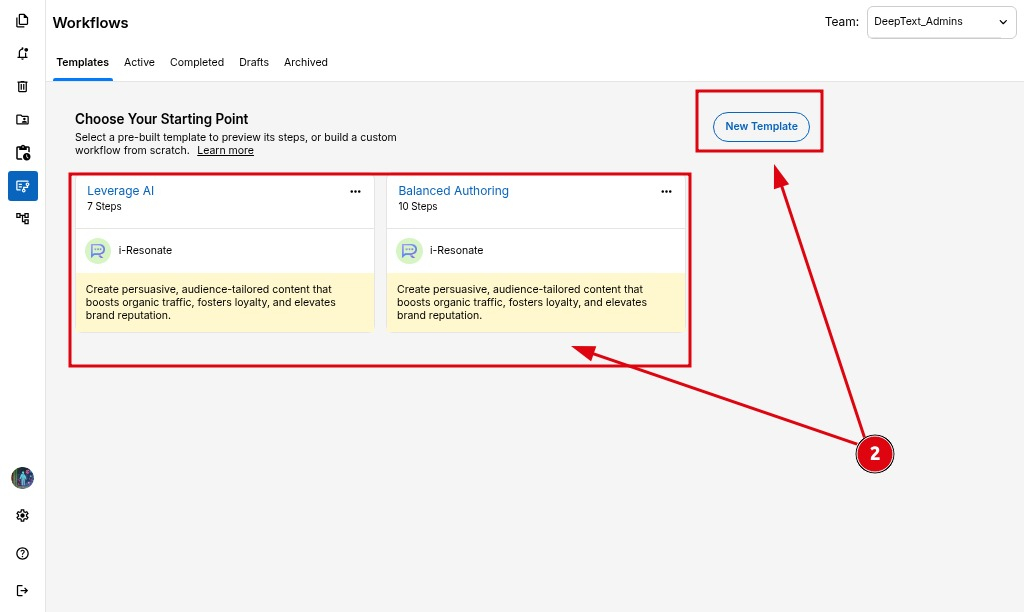
STEP 2: You can either choose ProofLex pre-defined templates or create a workflow by creating your custom template.
You can preview all the steps included in each workflow template. You may edit the Workflow Name and Workflow Objective, but the template’s predefined set of actions cannot be changed.
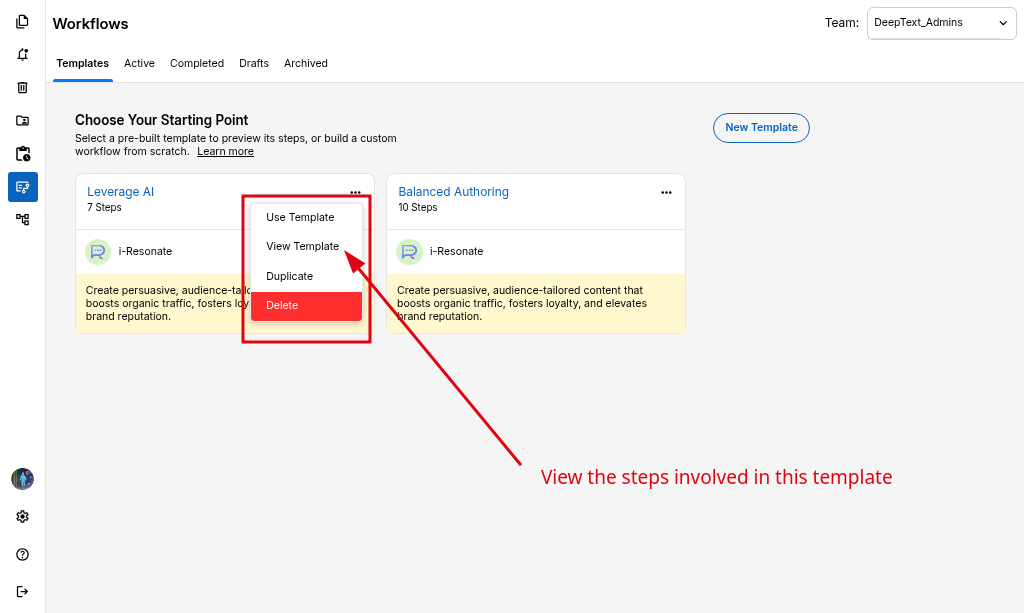
This Workflow has 4 Human tasks, and 3 Bot Tasks, as seen below.

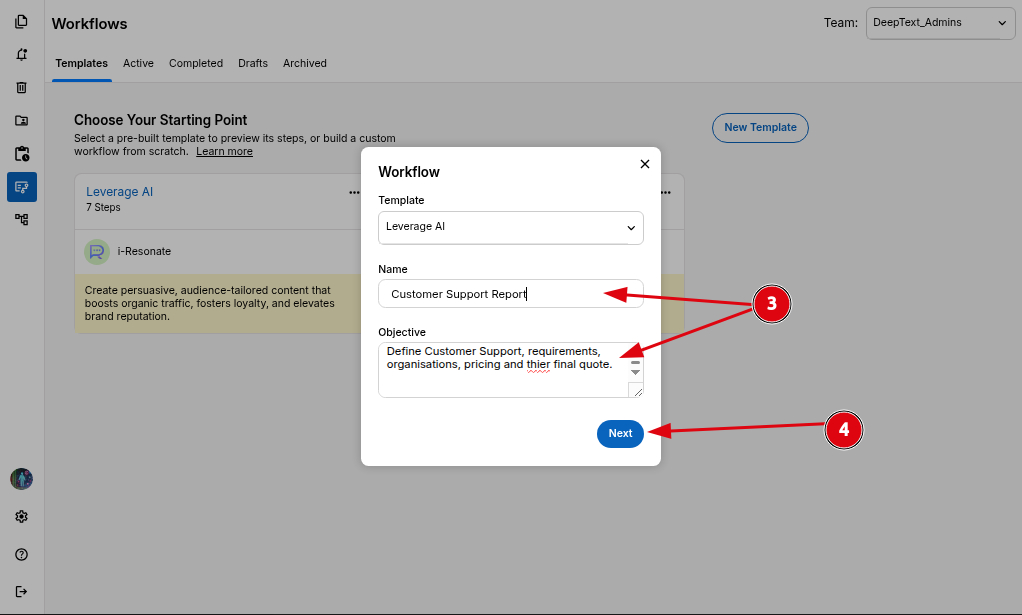
STEP 3: Choose any of the one Predefined Workflow Template (for example: Leverage AI). Enter the Workflow Name and add the Workflow Objective.
STEP 4: Finallly, Click Next to create your workflow.
Your workflow is now created. To activate it, you need to first complete all the task details.
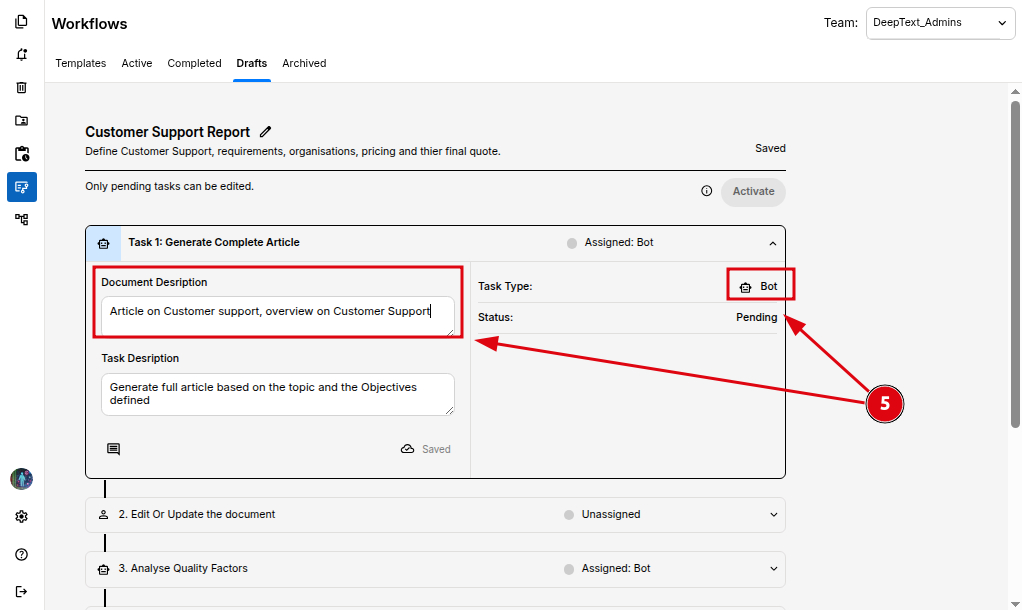
STEP 5: Add document descriptions for Bot Tasks.
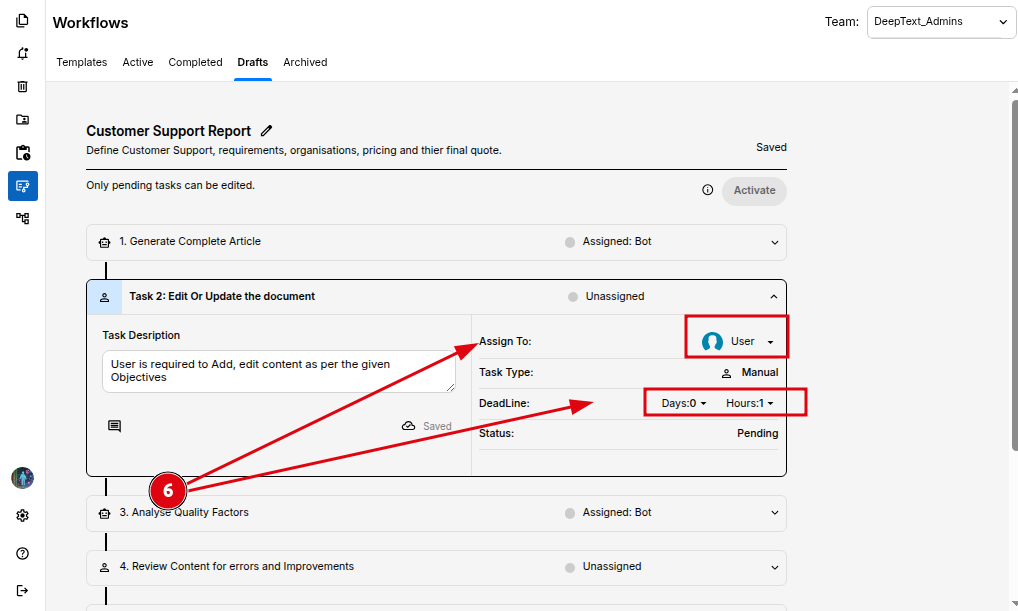
STEP 6: Assign team members and set deadlines for all Human Tasks.
STEP 7: Once all the tasks are ready, click the "Activate" button to start the workflow.
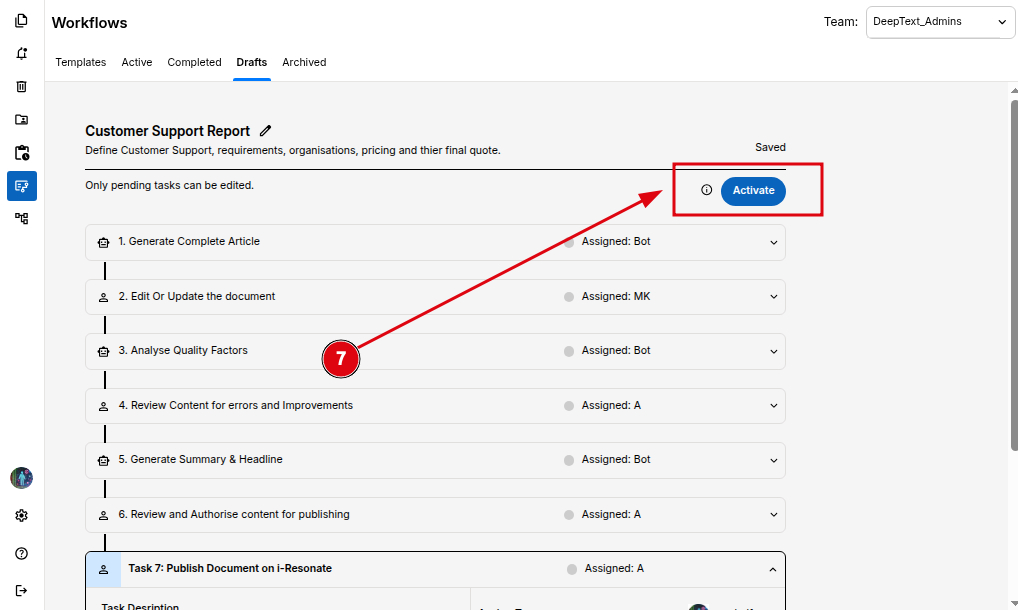
After activation, the workflow moves to "Active Workflows" and begins running step-by-step.
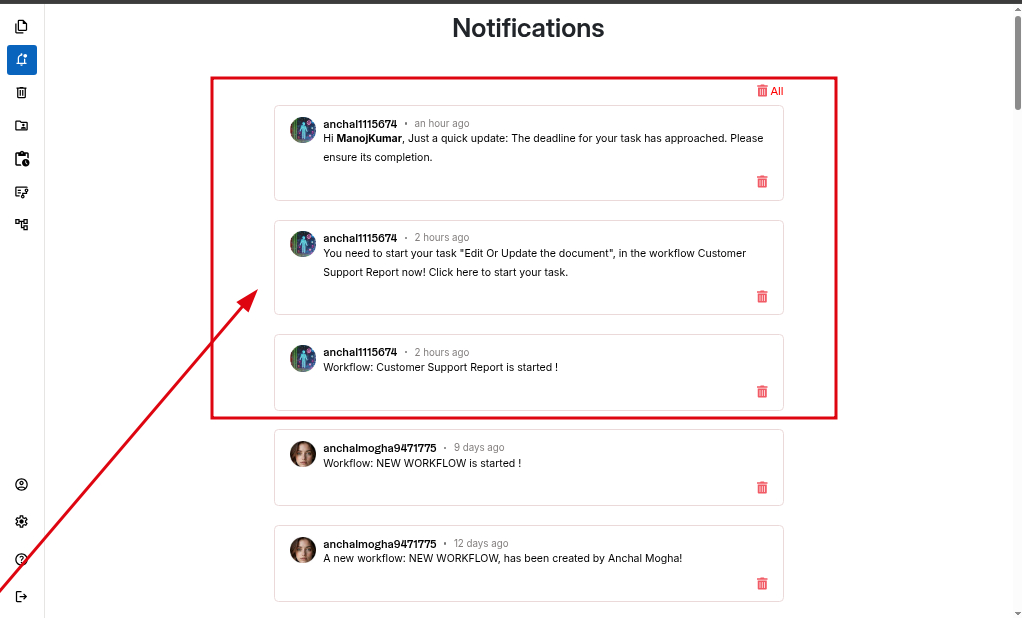
Each assignee will receive a notification for their pending task.
When a task is completed, its status automatically turns green. In the screen below, the first Bot task has already been completed.
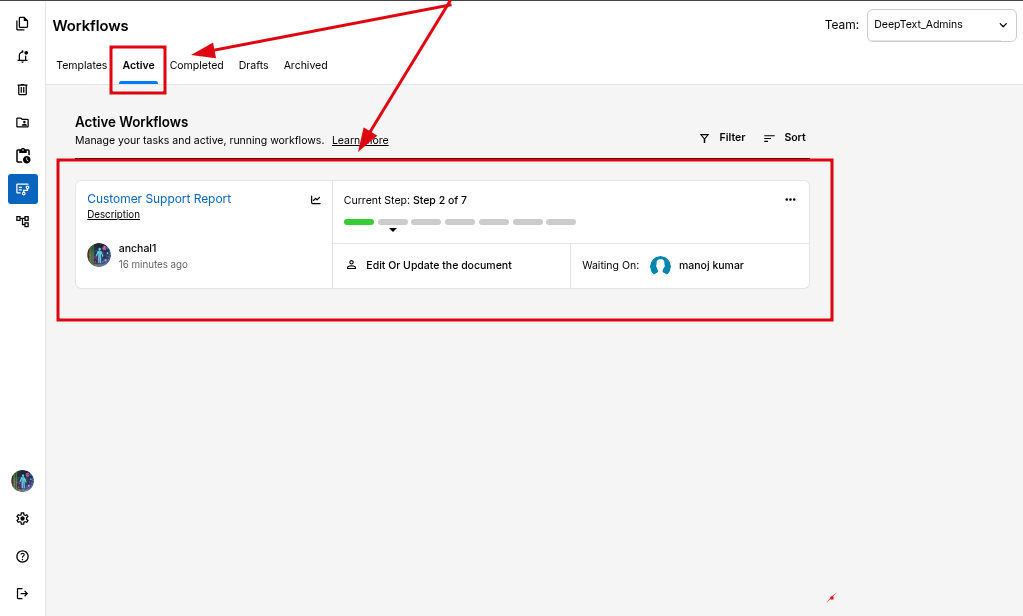
STEP 8: The next, human Task will now be assigned and the user will be notified to start the task.
STEP 9: Assignees (Team users, Team Admins, Reviewers, Super Admin) can continue working on the document to complete their tasks within the assigned deadlines. They can also add comments on their specific tasks to ensure smooth and effective workflow communication.
Once all the tasks of the workflow are done, the creator of the workflow can mark the workflow as completed.
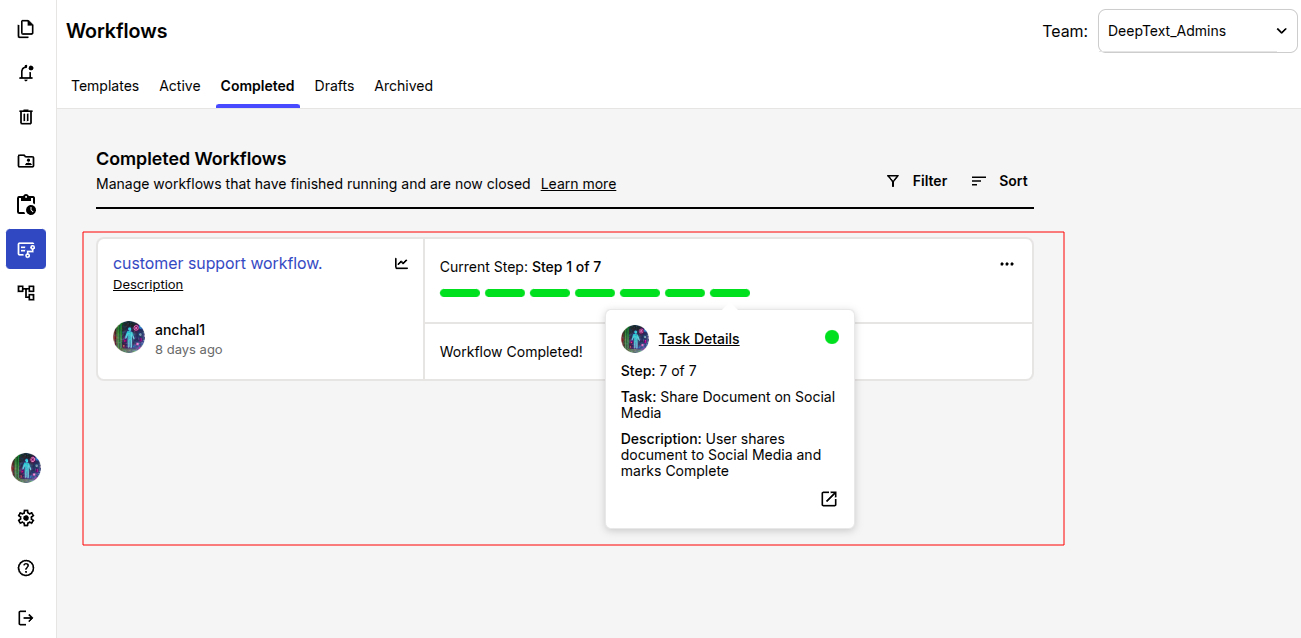
NOTE: Marking a workflow as Completed is a manual action. The workflow creator must update its status to “Completed.” Once this is done, the workflow moves to the Completed section and all members are notified.
You can also explore how to create workflow using custom templates in ProofLex.